

It can happen in a split second—you step down on a snow-covered rock, large gnarly root, or other obstacle protruding above the ground but hidden by a mantle of snow. The point of contact concentrates most of your body weight onto a very small area of the frame or foot pad/deck webbing of your snowshoe. The sound of splintering wood or ripped fabric confirms it: your snowshoe has just suffered an “injury” in the field.
The term “injury” is actually quite appropriate because most snowshoe repairs are similar to the first-aid procedures used to treat human injuries in emergency field situations.
A fractured section of frame on a traditional wooden snowshoe is akin to a broken bone in the human body and is treated in the field the same way—with a splint. Likewise, a tear in the fabric on a modern snowshoe is similar to torn skin (stitching), or a damaged binding and a sprained or twisted ankle (wrapping). The repair or first aid is designed to temporarily secure the “wound” in the field until more permanent repairs can be made.
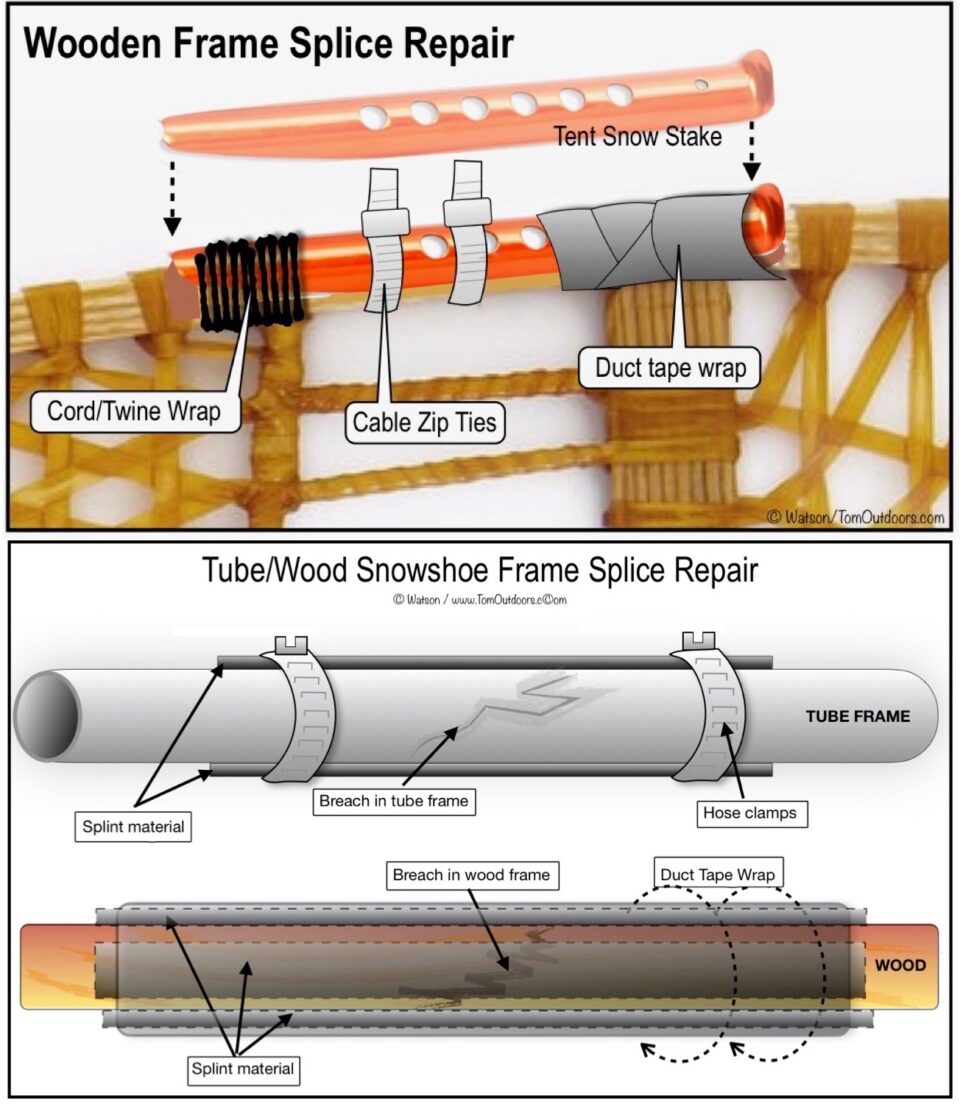
Breaks in the frame need to be stabilized and secured so the weight on the damaged section is distributed beyond the point of fracture. Using a splint (stick or tent stake) for support and a wrap of duct tape, wire, or hose clamps can support the frame just as a cast would on an arm or leg. Sometimes a metal insert or exterior tube splint can be used to repair damage to tubing on a metal frame.
Oftentimes, torn or weakened rawhide or synthetic webbing on traditional snowshoes can be repaired by attaching a new section onto the end of the broken webbing. It is also often possible to locate the secured webbing on both sides of the breach and use wire ties to connect and tighten the webbing across the weakened area.
Modern snowshoes with their high-tech, synthetic fabric foot pads or decking can most often be repaired with extra-strong vinyl duct tape. Decks torn loose or weakened due to a damaged rivet can be reattached using wire ties or twine, too. Both types of snowshoe decks can be temporarily mended by applying several wraps of duct tape around the entire frame to build up a support platform for the shoe.
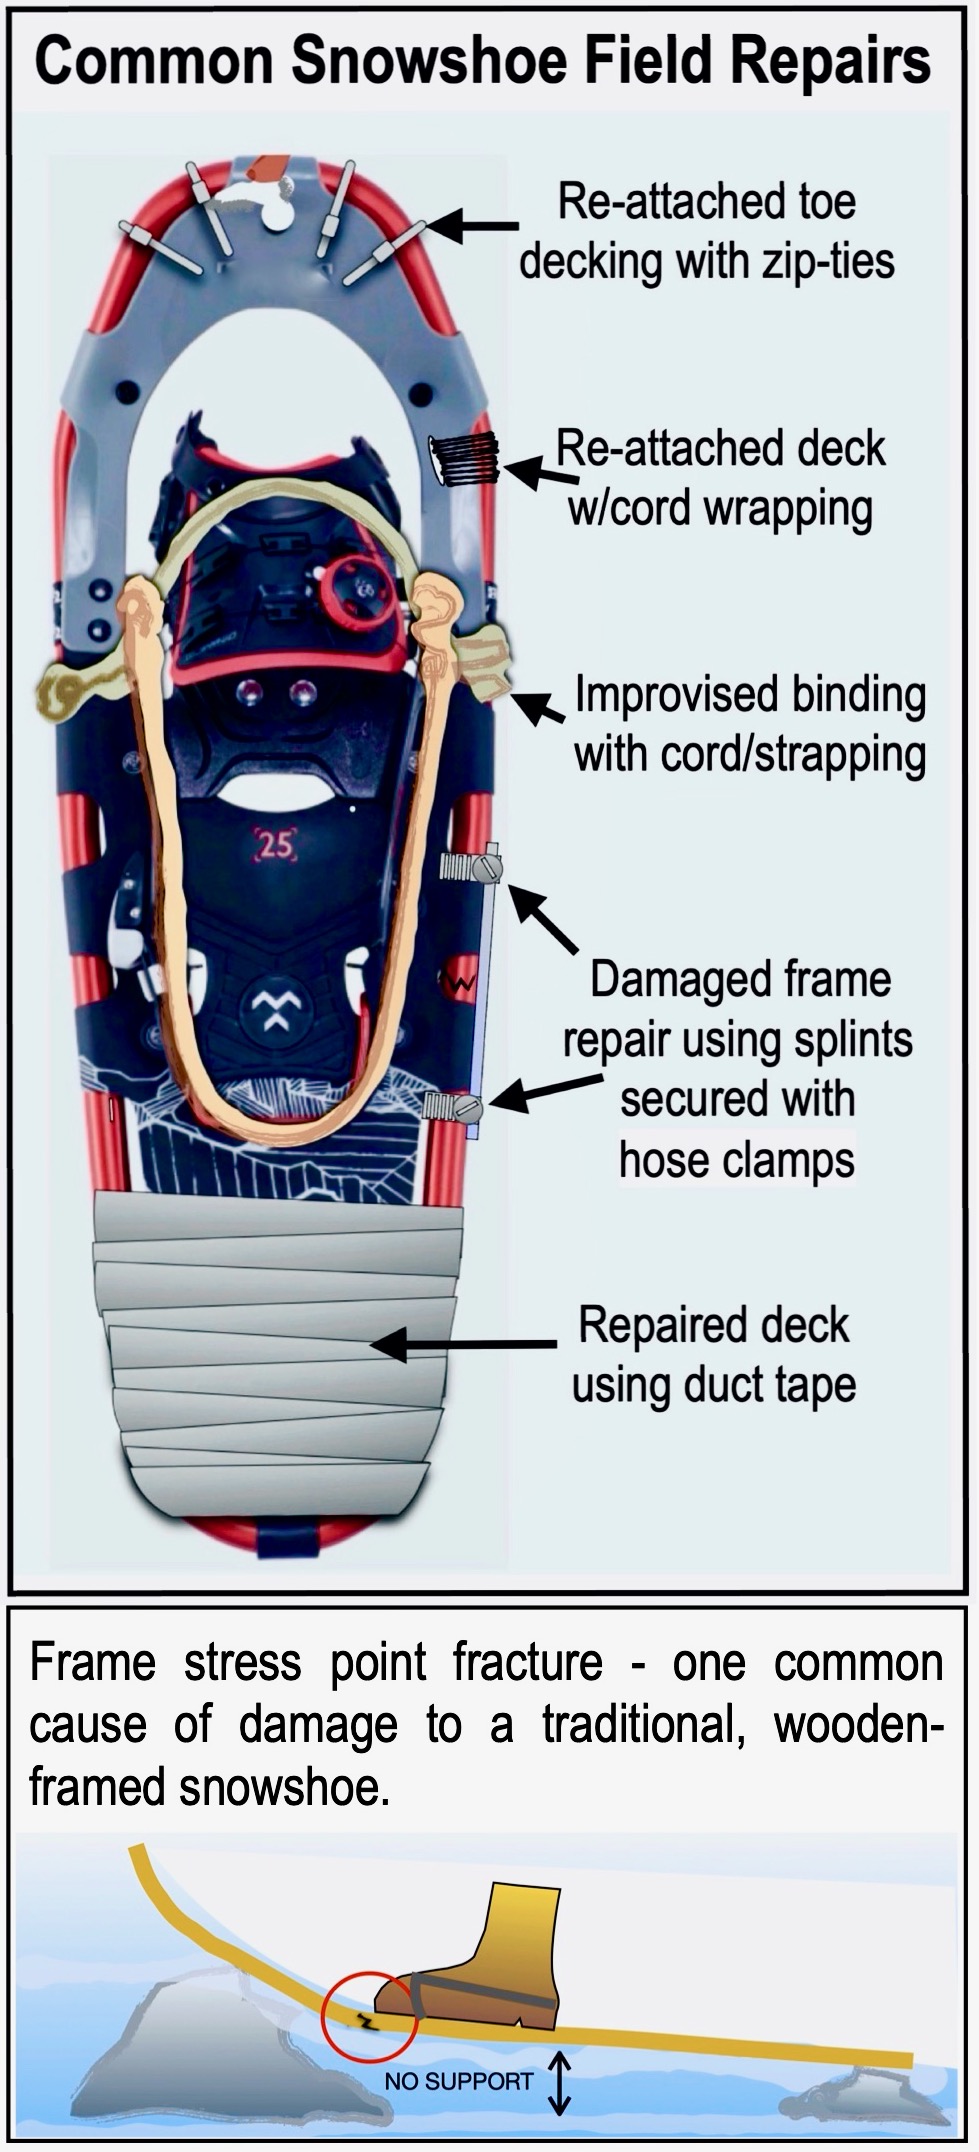
A lost or broken binding strap, or a repair to a damaged clevis pin, can be made from several layered strips of duct tape—secure enough to get you back to camp.
It’s critical to carry a snowshoe “first-aid” kit with you to facilitate these repairs in the field. The basic components are chosen because they are standard repair items. It’s also vital to anticipate what repairs might be needed based on the components of the particular type or brand of snowshoe you are using.
Some snowshoe manufacturers offer full repair kits or a selection of replacement components and hardware for their brand of shoes.
Snowshoe Field “First-Aid” Repair Kit
- Assorted lengths of nylon wire ties (include some steel zip ties as well)
- Thin, strong cord (consider seine twine)
- 3- to 4-foot stainless steel wire (workable gauge for wrapping, etc.)
- Repair tape (Gorilla tape, hockey-stick tape, fabric repair tape)
- Epoxy (limited cold-weather use)
- Assortment of hose clamps
- Splint material (tubing sections, tent stakes, etc.)
- Assortment of hardware (screws, bolts, nuts, fasteners, etc., specific to components of your snowshoe brand or design)
- Multi-tool with proper accessory attachments (pliers, wire cutters)
Anticipating potential damage and subsequent repairs can help you build your own field repair or first-aid kit. Note: These basic frame field fixes also work on ski poles.
The reliability of a repair may last only until you can return to a base camp or cabin to refine or upgrade the temporary field fix. Some repairs can be as strong as the original component, while others may not approach the full integrity of the piece repaired.