

It is easy and inexpensive to make a portable bucket seat and backpack from a 5-gallon bucket. Why spend the money on a commercial version when you can make one for far less?
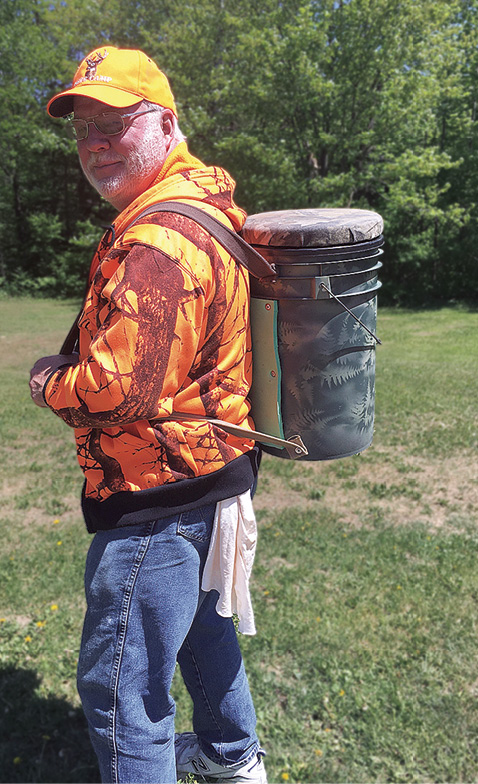
A portable hunting/fishing bucket seat backpack allows you to carry your hunting or fishing gear to your favorite spot and always have a place to sit.
MATERIALS OR EQUIPMENT NEEDED
A clean, tall 5-gallon or 6-gallon plastic bucket, two straps for shoulder—old cloth belts work great—paint for the bucket, and a lid or swivel seat of your choice. Tools will include: tape measure, drill with 1/8-inch bit, Shoe Goo, black Gorilla duct tape, pop rivet gun, 1/8-inch pop rivets 1/2-inch-long, and washers. Include a thin piece of flooring foam for a back cushion if you choose.
DIRECTIONS FOR CONSTRUCTION
Start by inspecting the bucket for cracks or concerns. You want to make sure the bucket is not cracked before you invest your time and resources.
PAINTING THE BUCKET
Paint the bucket your choice of colors. For winter, using flat black or dark green will show against the white snow background. This is a good idea if you want to be seen by people traveling by you. Have some fun with painting the bucket; you do not have to have it one color only.
For fall hunting use, it is suggested that a natural camouflage pattern be used.
PAINTING HINTS
One idea for fishing buckets is to use a strip of 3-inch-wide blue painters’ tape all the way around the top part of the bucket. Use a sharp knife to make sculpting marks that can be waves. Peel off the bottom part of the tape so the “wave” is visible and paint the bottom of the bucket. Paint it light blue, blending into a darker blue towards the bottom.
Let the bucket dry and carefully put the cutout part of the waves back into place so you can paint the top. When you are satisfied with the protective tape, remove the top part of the tape and paint the top of the bucket.
If you know a true artist, ask them to paint your bucket in the patterns of your favorite fish.
Hunting bucket camouflage patterns can be achieved using flat or matte finished paint in light brown, light green, black and dark brown.
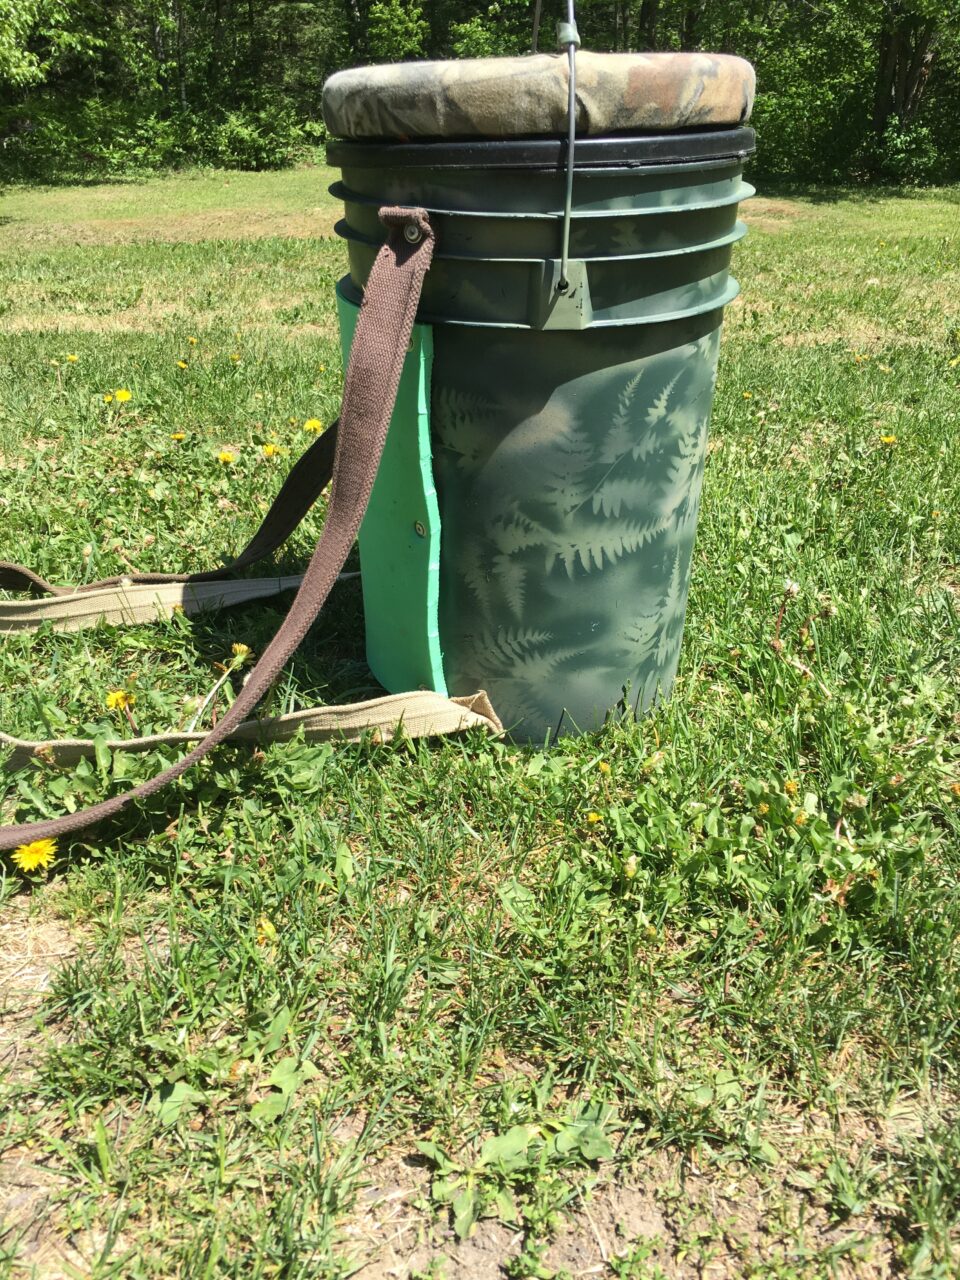
Randomly paint the outside of the bucket the colors you have. Next, place a piece of fern, a small branch with leaves or some grass, and mist a coat of the light green or tan over the natural material. The outline of your choice of material will show up in the mixed colors first painted. This pattern is very effective for camouflage in a boreal forest. Look at your hunting woods for patterns that will mimic natural foliage.
EMBELLISHMENTS
If you wish, you could add a tape measure sticker on the side of the bucket so you can use it for a quick measurement of fish.
CUTTING THE STRAPS
Find a couple of old cloth or webbed belts that are at least 2 inches wide. Measure both to a length of 40 inches and cleanly cut both ends at the 40-inch mark. Place a dab of Shoe Goo on the ends of the belt pieces to help keep them from fraying.
ATTACHING THE STRAPS
Locate which direction the handle normally goes and pick a spot opposite the side the bucket handle is resting on. Locate the center of the line going around the top of the bucket on the side facing you. Measure 5 inches on each side of a center spot and mark the top of the bucket.
Measure 1-inch down from the top of the bucket at each spot. Pick a spot before and just above the large ring that goes all around the top portion of the bucket. Drill a 1/8-inch hole through the bucket at this point. Repeat by drilling another 1/8-inch hole on the other side of the center mark. The two holes should be about 10 inches apart.
Pick an end of a belt and bend the end over at the 2-inch mark. Use a piece of tape to make sure they move less and slowly drill through two thicknesses of the belt. Note: for best results, place the folded belt on a scrap of lumber and slowly drill through the belt. Take your time drilling at this point so the belt does not wind up on your drill bit.
Place the folded belt end with the short piece towards the bucket. From the outside of the bucket, insert a 1/8-inch by 1/2-inch pop rivet and washer through the two holes in the belt and through the hole in the bucket. Be sure to place a washer on the belt side of the pop rivet for better holding power.
If the belt appears to fit well at this point, place the pop rivet gun over the rivet and pop/pull it tight. Be sure to wear safety glasses during this. Cover the pop rivet end with a strip of tape if you do not get a nice round rivet ball on the inside. You can adjust the length of the straps to fit your body size, allowing for hunting or fishing clothing to be worn.
Repeat for the upper bucket attachment of the other strap. Allow both straps to hang down when completed.
Find the center point of the line around the base of the bucket near the bottom but above the base “lip.” Measure a point about 6 inches each from the centerline you made in the first step. Moving the straps inward slightly if needed will help them stay on your shoulders while traveling.
Fold the last 2 inches of the bottom of the belt over towards the inside. This should make the belt, “strap” about 35-40 inches long. Drill 1/8-inch holes about an inch apart through the side of the base of the bucket about 1-inch up from the bottom of the bucket. Be sure your spot is above the bottom rim of the bucket so your belt attachment can be inside the bucket.
Using pop rivets and washers, attach the bottom straps of the bucket. Be sure to adjust the length, as it will fit your size while wearing a winter coat, etc.
Note: tape the strap to the bottom side of the bucket to see how it will fit your size. Adjust the length and placement of the bottom of the straps as needed.
Lastly, glue or pop rivet a thin piece of wood or foam to the front of the bucket, the part that will be at your back. I chose a piece of 10×12 inches, 1/2-inch-thick floor foam.
Pick up your bucket backpack and try it on for size.
FILLING THE BUCKET
Filling the bucket can be great fun. For a fishing bucket, you can purchase a bait cooler that will fit inside the bucket and use it to keep your bait lively.
Items to carry could include a fire-starting kit, first aid kit, food, bottled water or water filter, personal cook kit, flashlight, dry socks, etc. Personalize the bucket backpack with the items you want to bring.
COVER THE BUCKET
If you have the original bucket cover you can add a piece of Styrofoam to the cover for a softer seat. You can also purchase a commercial spin seat for the top of the bucket.
Lastly, use it to go hunting, fishing, or just observe nature.