

Although as common as sparrows in 2022, there was a time when a portable sleigh with a flip-over tent was a rare bird.
My first contact with this type of ice fishing shelter was in 1990, when I fished with a group of anglers from Minnesota and Manitoba. They were all fishing out of these new, portable tents called fish traps. A short time later I got my first trap and I definitely wore it out. Then, about 20 years ago, my kids started ice fishing with me, so it was time to get a larger tent. The old fish trap was upgraded to a two-man Clam Yukon. It easily fit myself and my two boys, although I usually got kicked out. That trap got a lot of use and over time, the familiar blue tent started to get tattered.
Recently, I’ve been eyeing up the newer traps that include a thermal tent. This thicker material is said to hold heat better and allow less light inside. But thanks to several ice fishing groups on social media, I learned you could upgrade an older fish trap with a thermal tent and a variety of accessories.
This winter, I began collecting the parts required to “trick my trap.” The first thing needed was a thorough inspection of my old unit to make sure it was worth the investment. Despite two decades of northwestern Ontario winters, my trap was in decent shape. The folding bars were solid, and the tub was not too badly worn. With my credit card in hand, I went online and ordered a new thermal replacement tent, as well as several accessories.
Trap Accessories
There are many things that you can do to your trap which will improve both comfort and efficiency. Some are DIY, some require purchase through a company. My Yukon was made by CLAM, a company located in Minnesota. The thermal tent replacement came through them, as did a couple of items specifically suited to that design. For the record, Otter, Eskimo, Frabill and other companies also make very good trap-style shelters.
One item that caught my eye was a kit for spreader pole storage. Having the internal spreader poles loose in the bottom of the tub always bugged me. This unit fixes that. The spreader storage is installed on the back of the tub and gets all the poles bound up and out of the road. Another cool accessory was a corner console shelf that could be used as a tray and drink holder. Again, some installation required but just a few nuts and bolts.

Another thing I’d never had inside my trap were lights. It turns out there are a wide variety of lights that can be purchased or DIYed that will brighten a dark tent. These vary from LED strips you’d use inside a car, to lights that can hang from the support bars, but you need power to do that. The simplest way is to install a small rack to hold a rechargeable 12-volt battery. A 12-volt can power LED lights for several hours. However, there is also a whole world of “power boxes” out there now that power both lights and your various devices like a cell phone or fish finder. I ordered a Canadian made one called the Lake Simcoe Power Box and it should do the trick.
Some DIY additions to my trap included adding a portable floor. To do this, I bought some interlocking foam flooring similar to what you might use in a workout area. The reason for adding foam flooring is two-fold: the first reason is to keep your feet insulted from the ice and the second is to have a non-slippery area for things like a propane heater. The foam also does not absorb water and is light to transport. Another simple trick is to use a plastic milk crate in your trap as a mini table and storage. The crate can also be used to put your fish-finder on. Plastic milk crates are very light and can be stuffed with items like tackle boxes when travelling. I also ordered a new cover for the trap, as the old one looked horrible.
Installation
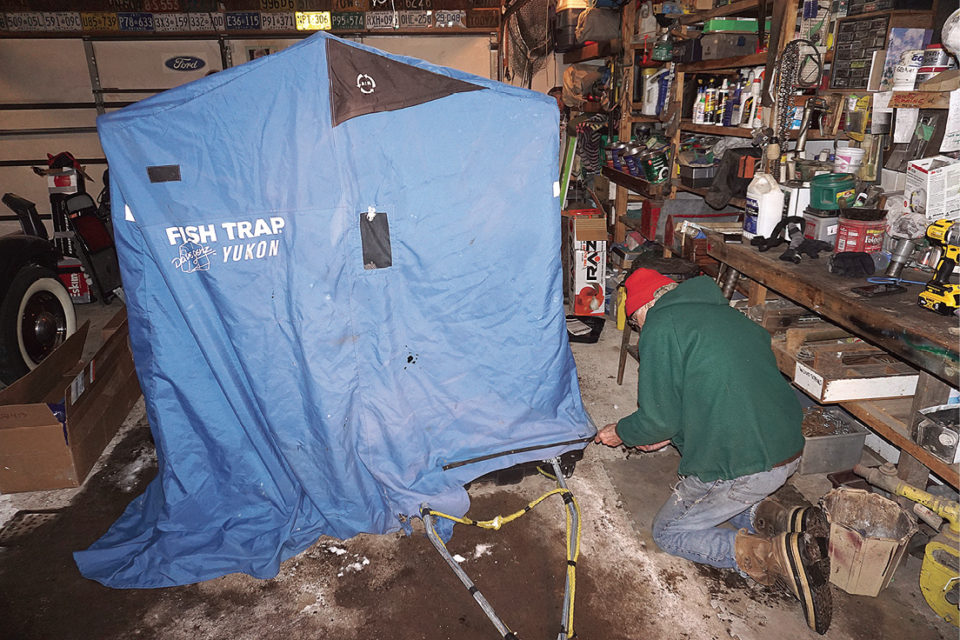
One evening in early February, my dad Gord Sr. and I spent an evening in his garage “tricking my trap.” Removing the old tent was relatively easy, as most of it was attached to the support poles by Velcro. The hardest part was taking out the screws that held the tent skirt to the back of the tub. A plastic flange held the skirt in place and that had to be removed as well. When the tent was off, we added the spreader pole storage, a corner console, and a measuring stick and holder that was screwed inside the front of the trap.
Then it was time to add the new tent. The thermal tent was noticeably thicker but handled well and with a little trial and error, we got it Velcroed on the poles. Once again, the hardest part was attaching the skirt to the back. Not only was the material heavier, but we had to take a bit more of it in to tighten it on the poles. This also went remarkably well and we finished the job in three hours.
I can report that my tricked-out trap has been on the ice and lived up to the hype. The thermal tent proved a blessing, holding in heat remarkably well and not flapping like the old one did. The accessories were helpful and overall, the fishing experience was great. I still have some stuff to do—including adding new runners to the tub—so it remains a work in progress.
So, if you have an ice fishing trap, I recommend a little “tricking” this winter. It will make your on-ice experience that much more comfortable and enjoyable.