
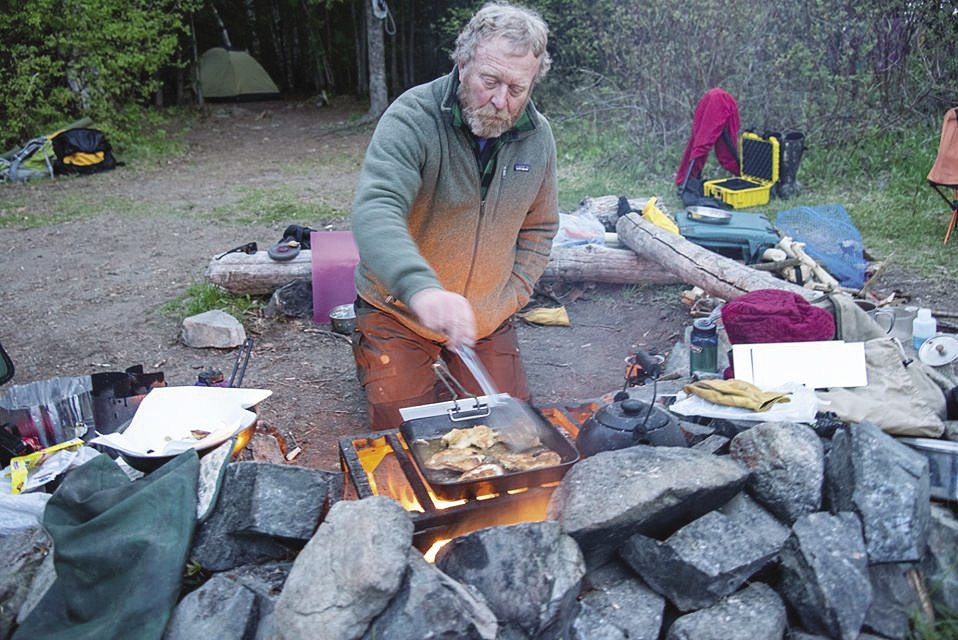
The scene has played out so frequently in the Northland that it evokes fond memories for most of us. The sun slides toward the western horizon as the campfire crackles and pops. Something tantalizing sizzles in a skillet, perhaps fresh-caught walleye or trout fillets. You and your companions are spaced around the fire ring on logs or rocks, occasionally moving to evade the shifting smoke. Perhaps your canoe rests on the rocky shoreline, awaiting an after-dinner tour of the calming lake.
Many who camp in remote areas use pre-packaged meals that can be purchased at their favorite outdoor store or online. These compact, light-weight meals are quite good. I use them frequently on backpacking trips where weight and ease of use is a primary consideration. For canoe camping, though, I generally prefer to outfit myself from grocery stores. On the lakes, I value fresh food over considerations of weight. At the beginning of my trip, I may strain under the weight of the food pack, but I very much enjoy my mealtimes.
When I plan a trip, I have different strategies for breakfast, lunch and dinner. For breakfast I generally focus on foods that can be prepared relatively quickly yet are substantial enough to sustain me through the morning hours when I hope to put many miles behind me. For lunch I mostly have a variety of foods to nosh on, and for dinner I like to feature fresh root vegetables whenever possible.
Why root vegetables? Though they are heavy, they keep for a long time. Carrots, onions and rutabagas can last a couple of weeks if properly cared for. I like to bring cabbage, celery and garlic as well. My wife Kathy makes a variation of the Japanese dish, Kimpira, that is always a hit after a long paddle. The ingredients, carrots, onions, rutabaga and maybe parsnips, are cut into matchstick shaped strips and sautéed in oil, first at a high heat for about five minutes, then at a lower heat for up to 20 minutes; add soy or tamari sauce to taste near the end.
Another popular dish a few days into the trip is burritos. For this I use dried refried beans, available in bulk at your local co-op and reconstituted easily, tortillas, salsa (which can be stored in a Nalgene bottle), cheese, which should keep for up to three days, and chopped cabbage instead of lettuce or cilantro.
We also bring a variety of pastas, easy to cook rice, and cous-cous. Spaghetti sauce can be stored in Nalgene bottles as well. Tuna makes a handy protein that can be added to the sauce—be sure to buy tuna in foil bags and not tins. Bring some Parmesan cheese along—it is very hard cheese, and the harder the cheese, the longer it will last without spoiling. It is easy to experiment with other pasta dishes. Try stir-frying some vegetables with garlic and onion and adding that to your favorite pasta, then melt in some cheese.
Another delicious dinner option is to slice potatoes or other root vegetables, onions, garlic, and if early enough on your trip, your protein of choice, then wrap it all in tin foil and place it in the coals of your fire. Do this only when the fire has burned down to coals. Let it go for 20 minutes to a half hour.
I always hope for at least one meal of fish. Personally, I like to pan-fry my fillets over relatively low heat, without batter, in olive oil and seasoned with salt, pepper and paprika. For those who like a more traditional fish fry, there are plenty of easy options. I often bring extra pancake mix and season it with salt and pepper then coat the fillets while slightly wet. There is a popular product named Shore Lunch that works well, and many people like to bring along Panko for their fish fry. There is little more satisfying than fish so fresh it curls up when it hits the hot pan. I bring along a side of rice, rice and beans, or cous-cous to accompany my fish. The above mentioned Kimpira also pairs well with fish.
Bannock is a campfire staple that is hearty and quite easy to make. Mike Bartz, of Border Lakes Tour and Guide Service, takes his bannock very seriously. It is best to pre-mix your ingredients. For every cup of whole wheat flour, Bartz mixes three tablespoons of powdered milk and one teaspoon of baking powder. In camp, just add a little water at a time until the dough has a soft consistency. Bartz also likes to add brown sugar and raisins, though this is not necessary. The dough can be fried, cooked wrapped on a stick, or baked. Bartz prefers to bake his in a fry-bake pan. He flattens the dough in a lightly oiled pan. The cooking time varies depending on temperature, but baking is best done over coals. The bannock will have to be flipped after it has browned on the bottom. As a special treat, Bartz likes to sprinkle cinnamon and drizzle rum on top after it has been flipped. Finish baking, then enjoy. Bartz claims that the best bannock is cooked in bear fat, for those with access to such ingredients.
For those who prefer to pack light for the trail, there are excellent do-it-yourself options that involve a food dehydrator. Bartz has developed many great dehydrated one-pot meals for the trail. Some of his favorites are a Thai peanut soup, and spaghetti with a dehydrated sauce. He says it is easy to dehydrate cooked meat such as hamburger to add to the sauce.
Former restauranteur, caterer and gourmand Susan Bishop has adapted an amazing chicken casserole dehydrated meal from the Leave-No-Crumbs Camping Cookbook by Rick Greenspan and Hal Kahn. She takes a four-pound chicken and cuts it into parts, then coats it in flour seasoned with paprika, garlic powder, salt, pepper, basil, savory, and parsley. This she bakes in a Dutch oven for 1.5 hours with sautéed onion, garlic, celery, carrots, red pepper, white wine and chicken stock. For the last five minutes, she adds in sautéed mushrooms and halved pimento-stuffed olives. After the chicken is fall-off the bone tender, she debones the chicken. She then spreads the casserole onto lined trays and dehydrates for 12 to 14 hours. Freeze in airtight bags. It will last for about a week on the trail. Rehydrate by adding water to cover and simmering for about 20 minutes.
There are many more options for do-it-yourself campfire meals. The key is in good planning, and for me, plenty of fresh root vegetables. They are versatile and can be added to a variety of dishes. I’ll take the extra weight every time.