
The dark black skies of winter offer the ideal conditions for photographing the northern lights. This winter and spring could provide even better conditions because NASA is predicting that a solar maximum will occur in early 2013. The solar maximum is the peak of solar activity in the sun’s natural cycle, and it occurs approximately every 11 years. During a solar maximum the number of sunspots increases and the sun’s corona, its atmosphere, develops active regions. These active regions could erupt and send a coronal mass ejection (CME) towards earth. When a CME hits, it often causes northern lights. To help you get ready to capture the event with your camera, here’s a quick and dirty guide to photographing the northern lights.
Camera
Although you can photograph the northern lights with any type of camera that allows manual camera settings, it’s best to use a DSLR or a mirrorless interchangeable lens camera; these higher-end cameras have larger sensors that deal with noise better than point-and-shoots (noise is that nasty, pixelated look). Some newer point-and-shoots, such as Sony’s RX100, also do well with night, but they’re an exception to the rule. You’ll also need a wide-angle lens, a sturdy tripod and a shutter release cord, which prevents the camera shake that causes blurry photos.
Location
Before photographing the northern lights, you’ll need to find a location to shoot them—ideally a dark location away from the city lights. A good indication that you’re far enough away from city is when you can see the Milky Way in the sky. There are exceptions to this; if the northern lights are especially bright (rare around Lake Superior), you might see them from inside city limits.
Composition
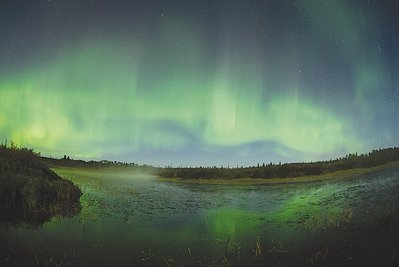
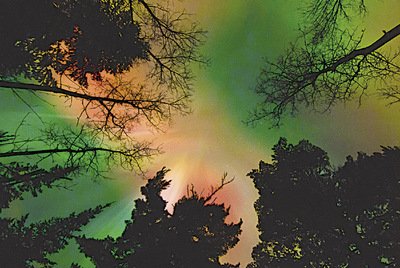
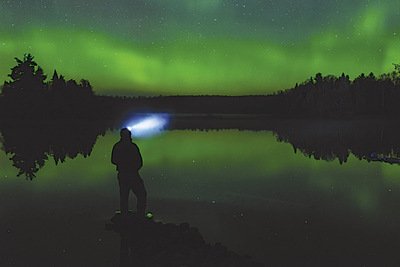
Once far enough away from the city, look for a location that has an open view to the north. Instead of just looking for a wide opening, find one with interesting trees or hills to include at the bottom of the photo. By including a part of the scenery in your photo, you anchor the northern lights to the earth, and it helps your photo’s viewers appreciate the scale of the event. Even though you’re including the ground, devote the majority of the image to the northern lights. One of my favorite places for shooting the northern lights is where The Grade crosses the Cascade River near Grand Marais; I take my photography workshops to this location when the northern lights are out.
Camera Settings
After you find a composition that you like, lock down your tripod and set your aperture as wide as it will go, usually between f/1.4 and f/4. Then set your camera to ISO 800 or 1600 (higher means more noise) and your shutter speed to 30 seconds. Shoot a picture. When finished, look at the image on the LCD screen. If it looks too dark, increase the ISO. If it looks too bright, decrease the shutter speed or set your aperture to a higher number. Remember that in the dark, images on the LCD screen always look brighter than on a home computer. If you know how to use the histogram, check it to see if it’s far enough to the right. I shoot most of my aurora images at ISO 1600 to 3200 (my camera has limited noise), f/2.8 or f/4 for 20 to 30 seconds.
Northern Lights Forecast
With the right tools, it’s easy to predict the northern lights. The best place to start is at www.spaceweather.com. Once there, scroll down the page while watching the left-hand column.
First find the Current Auroral Oval. It shows the northern lights over the northern hemisphere. If there’s white over your location, you might see a green glow on the horizon. Once you start seeing yellow or red over your location, it’s time to get outside. The second tool is the Planetary K-index. Click on the “more data” link. In northern Minnesota, a Kp equal to 4 means northern lights and a Kp of 5 means that the aurora will reach as far south as Duluth. At the bottom of the column, predictions of up to 48 hours away are available as a percentage.
If you have a smartphone, try Aurora Buddy for Android. When the northern lights are overhead, it triggers an alarm. On an iPhone, try Auroral Forecast.
Spaceweather.com also offers a subscription phone service for $4.95 a month. When you subscribe, it will call you with aurora predictions.
By Bryan Hansel